
Synth Tutorials, Patches, Sound Design

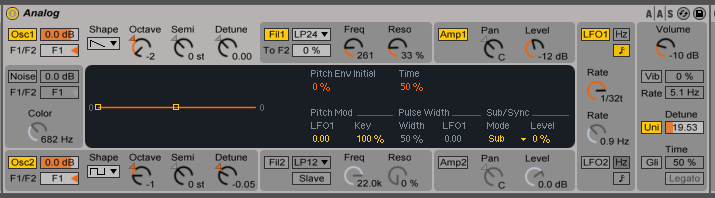
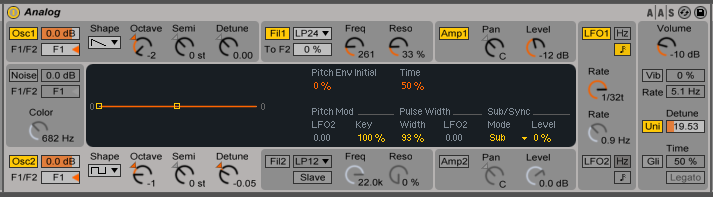


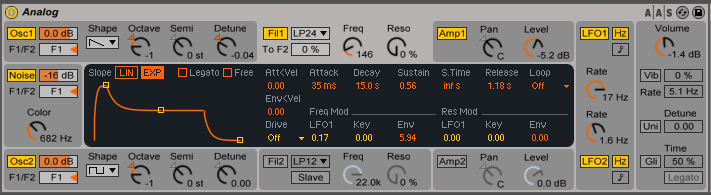
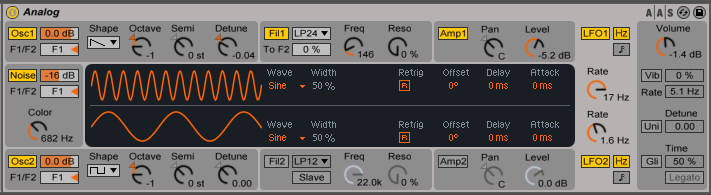


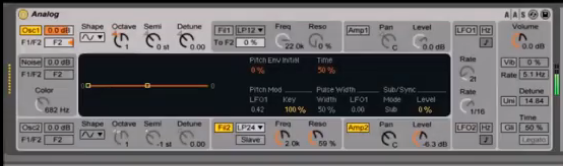
Send The Oscillator 1 to Filter 2 in order to use both Lfo1 and Lfo2
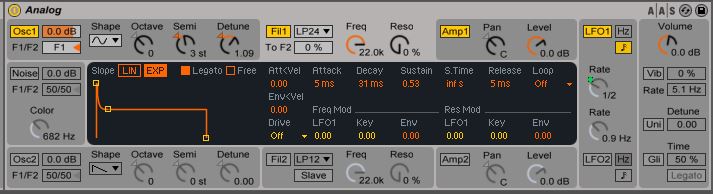
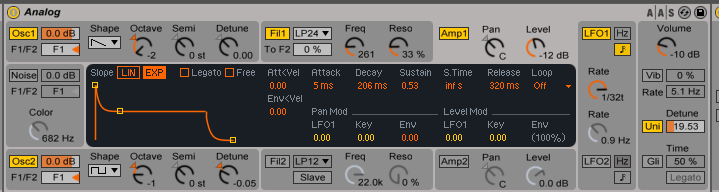
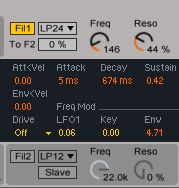
Attack: 5ms, Decay: 66mss, Sustain: 0.00, Release: 5ms
Attack: 5ms, Decay: 15.0s, Sustain: 0.00, Release: 182ms


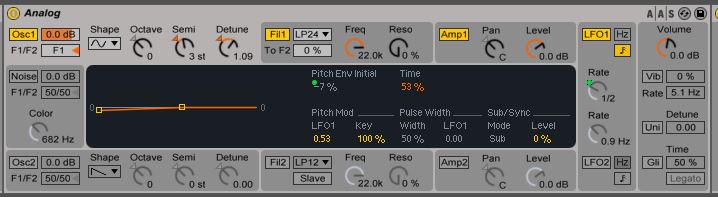
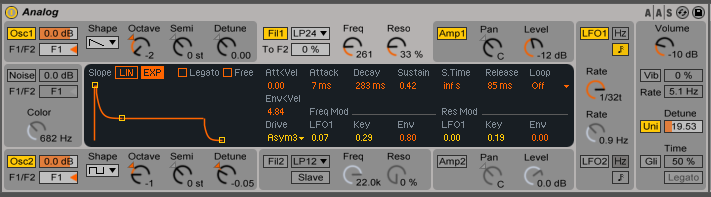
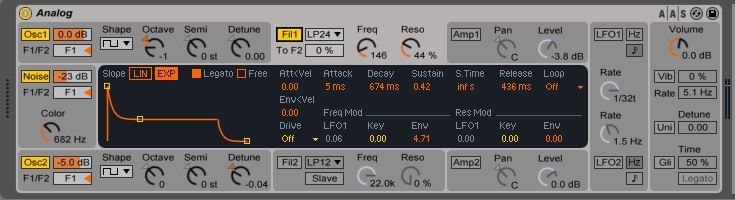
Type: Lp 24, Freq: 2.2k, Reso: 49%, Env: 0.52, Lfo1 on Frequency Mod: 1.99, Lfo1 on Reso Mod: 1.58
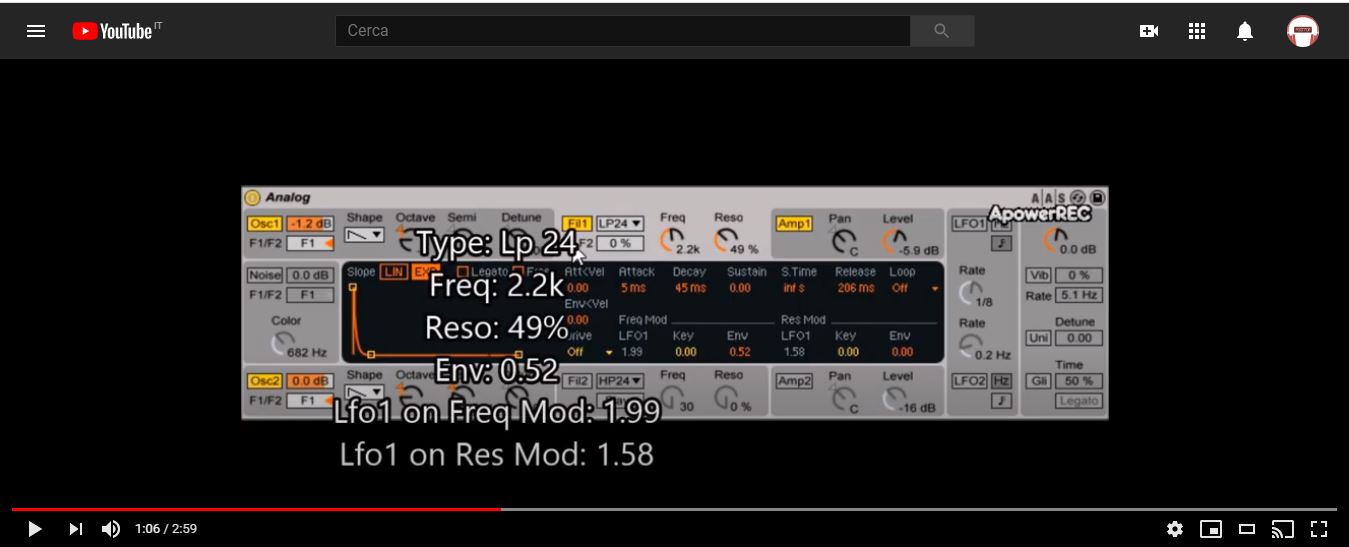
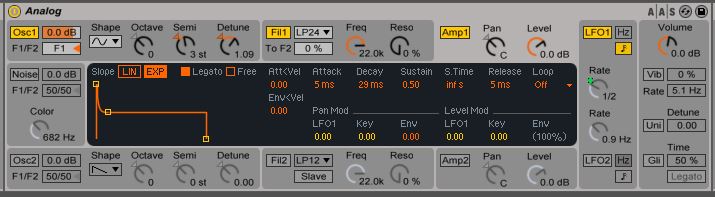
A: 5ms, D: 45ms, S: 0.00, R: 206ms
A: 5ms, D: 194ms, S: 0.00, R: 5ms
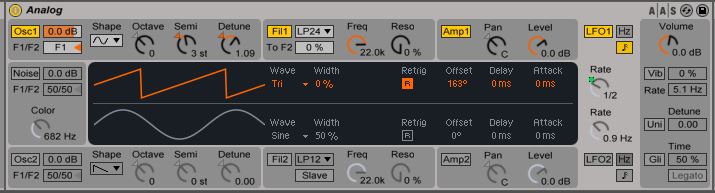
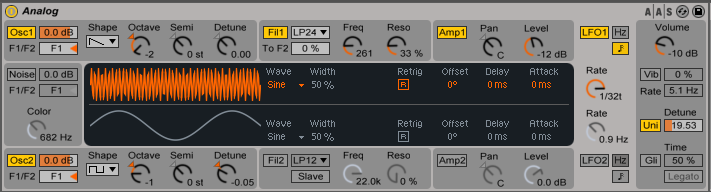
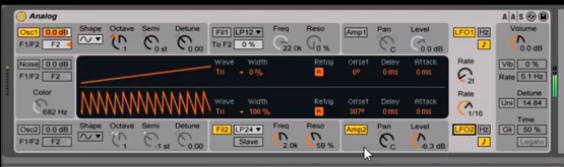
Lfo1 Shape: Noise1, Rate: 1/8
L’ Lfo1 come abbiamo visto sopra andrà a modulare il Cut Off e la Resonance del Filtro
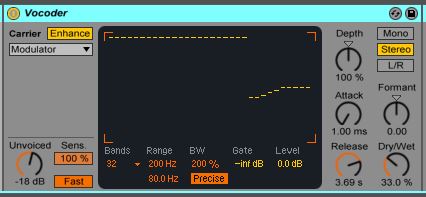
Applicate un Vocoder alla catena con le seguenti impostazioni
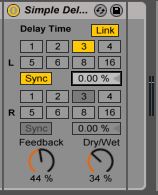
A completare la catena un effetto Delay
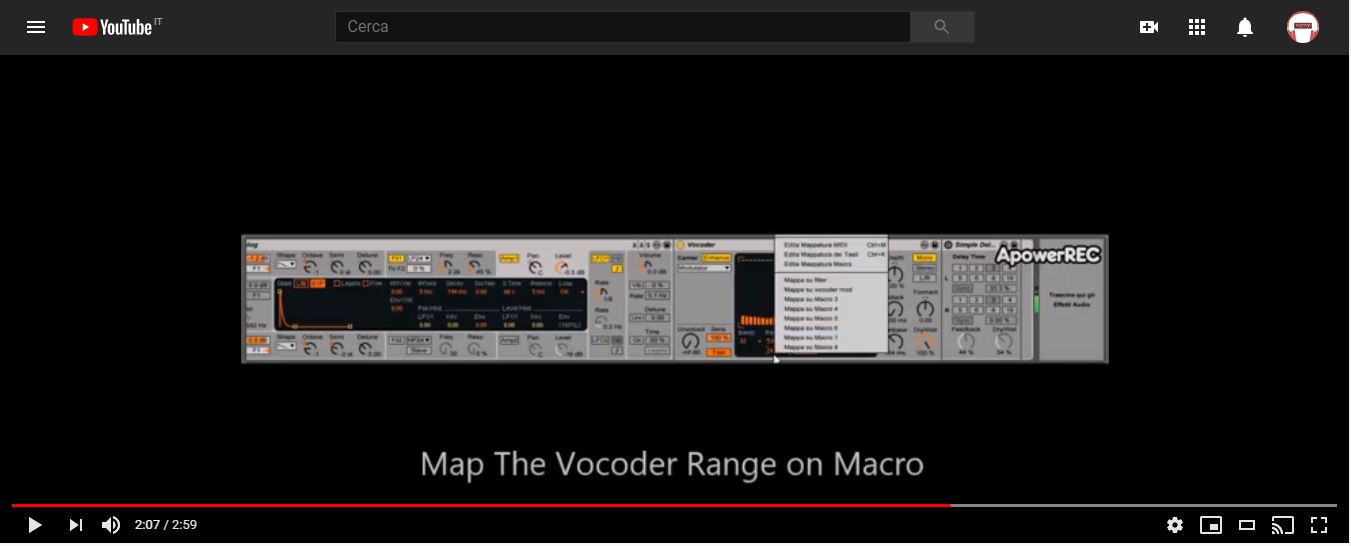
Mappa infine su Macro sia il Cut Off del Filtro che il range del Vocoder

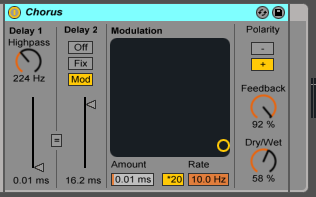
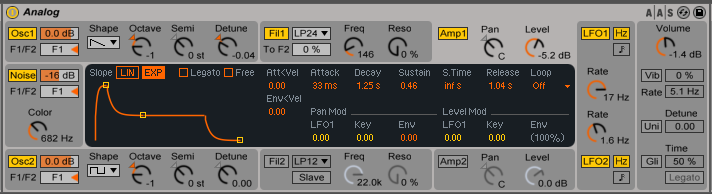
La particolarità di questa drum machine è il suono della kick, processata da un Flanger e da un Chorus, che la caratterizzano dandole una sorta di effetto “Sweep”
Caricate una kick stile Linn Drum o DMX o qualsiasi altra kick campionata. Alla Kick ho applicato nell’ordine un Flanger, un Chorus e l’effetto Saturator di Ableton Live
Di seguito gli Screenshot del Drum Rack LD (Linn Drum) con le modifiche apportate


Lo Snare è stato ottenuto processando un Roland Tr 606 Snare attraverso un Chorus, con l’aggiunta in Layer di un White Noise sempre processato da un Chorus


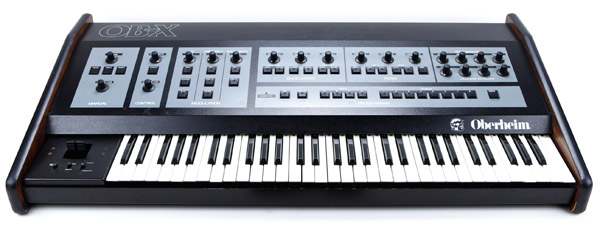
Di seguito i parametri della patch, trasportabile su qualsiasi altro Synth o Soft synth
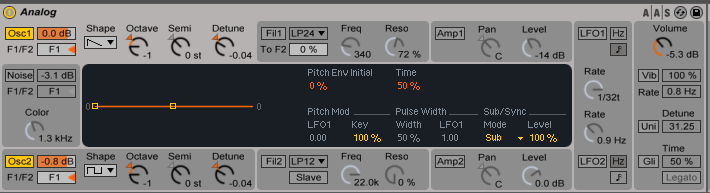
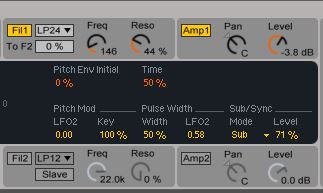
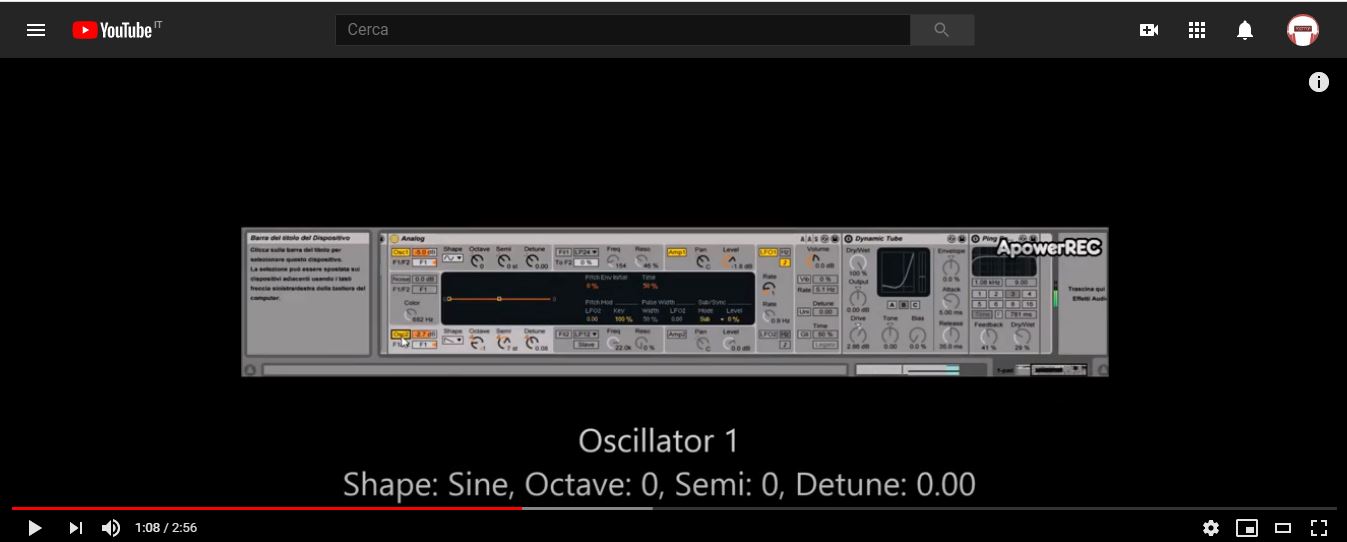
Shape: Sine, Octave: 0, Semi: 0, Detune: 0.00
Shape: Saw, Octave:-1, Semi: 7 st, Detune: 0.08
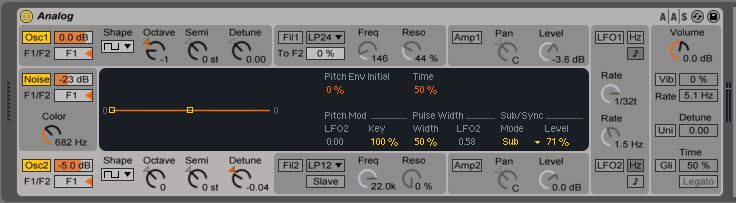
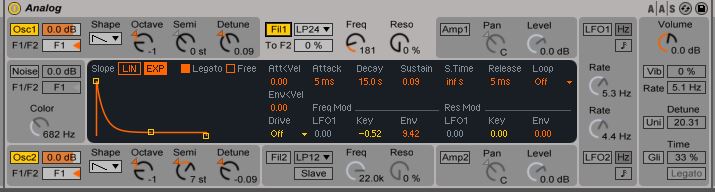
Freq: 154, Reso: 46%, Key: 0.89, Env: 1.54
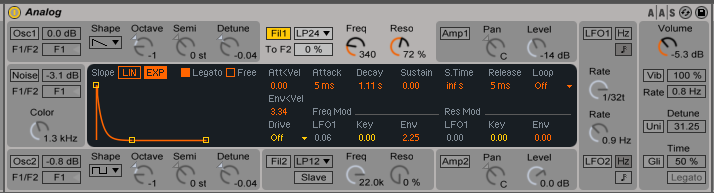
Lfo1 > Freq Mod: 0.12, Env > Vel: 4.40, Filter Drive: Sym 1
A: 3.60 sec, D: 3.60 sec, S: 0.67, R: 97 ms
A: 5ms, D: 15.0 sec, S: 0.00, R: 436 ms
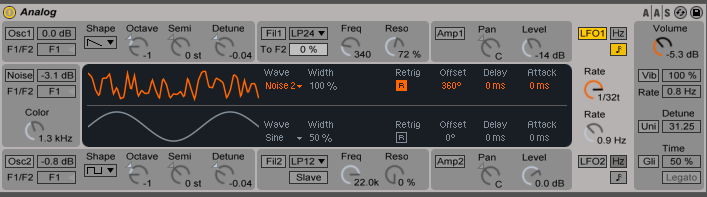
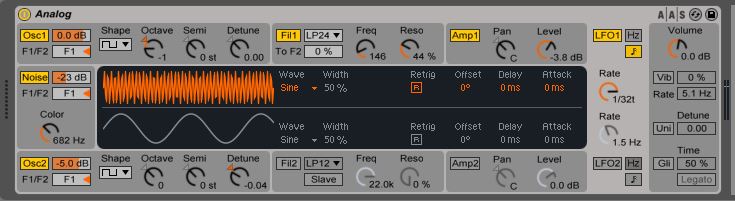
Shape: Sine, Rate: 1
L’unico Lfo usato andrà a modulare la Frequenza del Filtro, attraverso il parametro Lfo1 > Freq Mod, nella sezione Filter di Analog
Di seguito il video Tutorial su You Tube

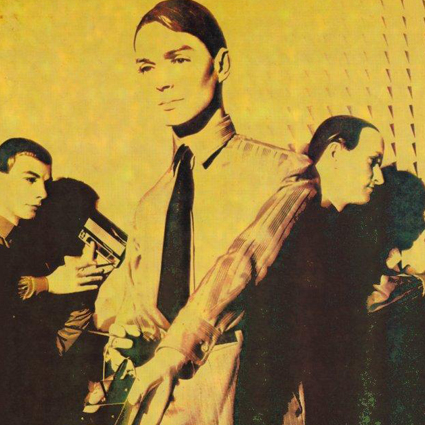
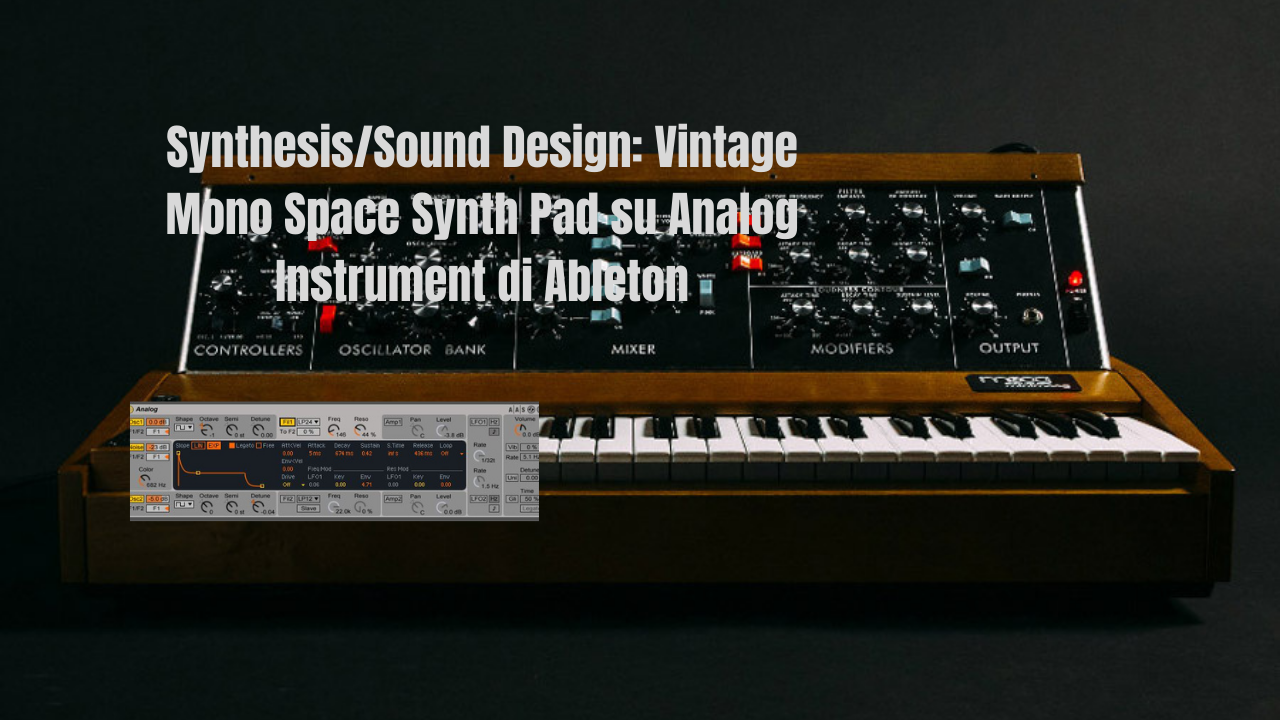
La particolarità di questo Synth Lead è l’intervallo di “Quinta” tra gli Oscillatori, fattore che gli dona un carattere “Vintage”, classico dello Space Rock dei ’70s di Hawkwind, Pink Floyd ecc.
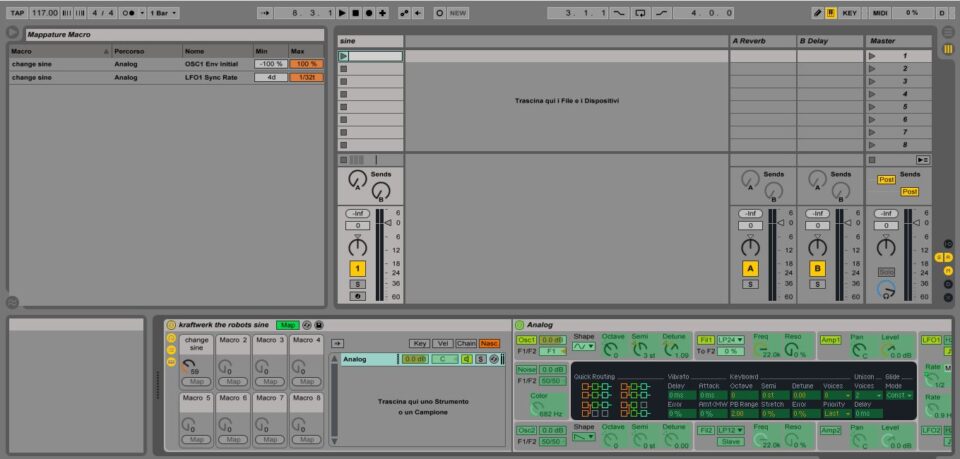
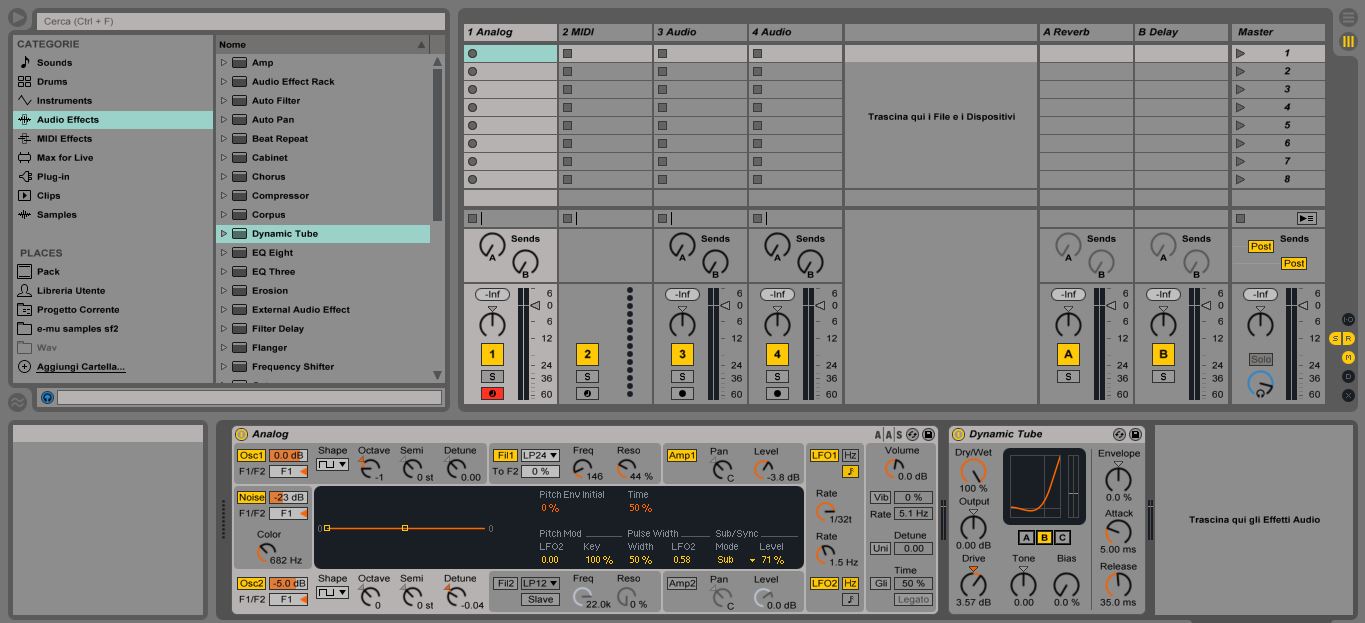
Di seguito i parametri per la programmazione del suono su Analog Instrument, l’emulatore “Analogico” a sintesi sottrattiva di Ableton Live.
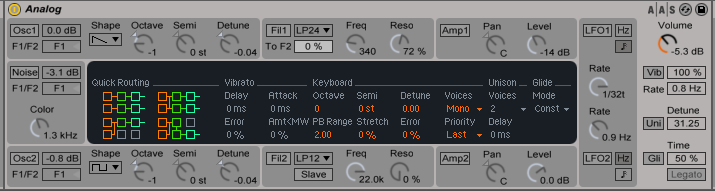
Dopo aver settato lo strumento in “Mono”, dalla Sezione “Parametri generali”, guardiamo più da vicino i valori per ogni singola sezione del Virtual Synth Analog.
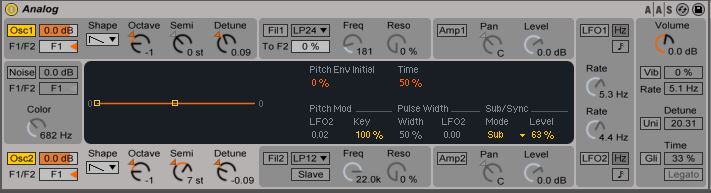
Nella Sezione Filter va attivato il parametro “Legato”. Se tale parametro è disattivato, ogni nuova note innesca il proprio inviluppo. Attivando il parametro “Legato”, invece, se una nuova nota viene suonata mentre un’altra è tenuta, la nuova nota usa l’inviluppo della nota originale dalla sua posizione corrente.
Alla catena ho inserito un Dynamic tube effect, pr “colorare” il suono e un delay, per dargli un tocco “space”

Guarda il Tutorial sul Canale You Tube
Apri un sito e guadagna con Altervista - Disclaimer - Segnala abuso - Privacy Policy - Personalizza tracciamento pubblicitario